|
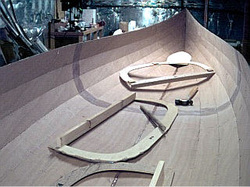
The second fill coat is easy and fast because you are just rolling on epoxy and brushing it out. After it had cured Nancy and I flipped Taiga over and it was time to begin work on the inside. The first task is removing the forms. I decided to try knocking them out and that worked great! I used a hammer and a dowel to strike right at each glue joint and it would break free. I decided that this was a good time to scrape the edge where the outer gunwale will be glued. It is much easier to scrape now before the epoxy has reached its final hardness.
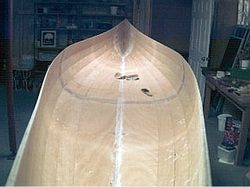
Even though the forms and most of the hot glue are gone, there is still work to be done to prepare for the inside saturation coat of epoxy. Scraping and sanding finally made the entire surface smooth to the touch. Then I used the shop vac to remove all the dust. A tooth brush helps to dislodge any dust from the holes and seams. I am now satisfied that the inside is ready for epoxy. |
|
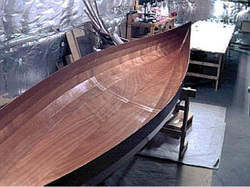
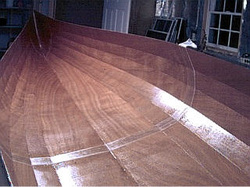
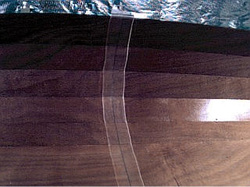
As with the outside, the epoxy really brings out that wonderful mahogany grain. I worked my way down one side and then up the other brushing extra epoxy on the seams and then rolling it out. Finally I smoothed everything with a foam brush. Then, while the epoxy is still wet, a 3 inch wide fiberglass tape is applied to the center butt joint for reinforcement. This tape has a very pronounced edge which will have to be scraped and sanded off before the 4 inch tape can be applied on top of it.
|
|
|
